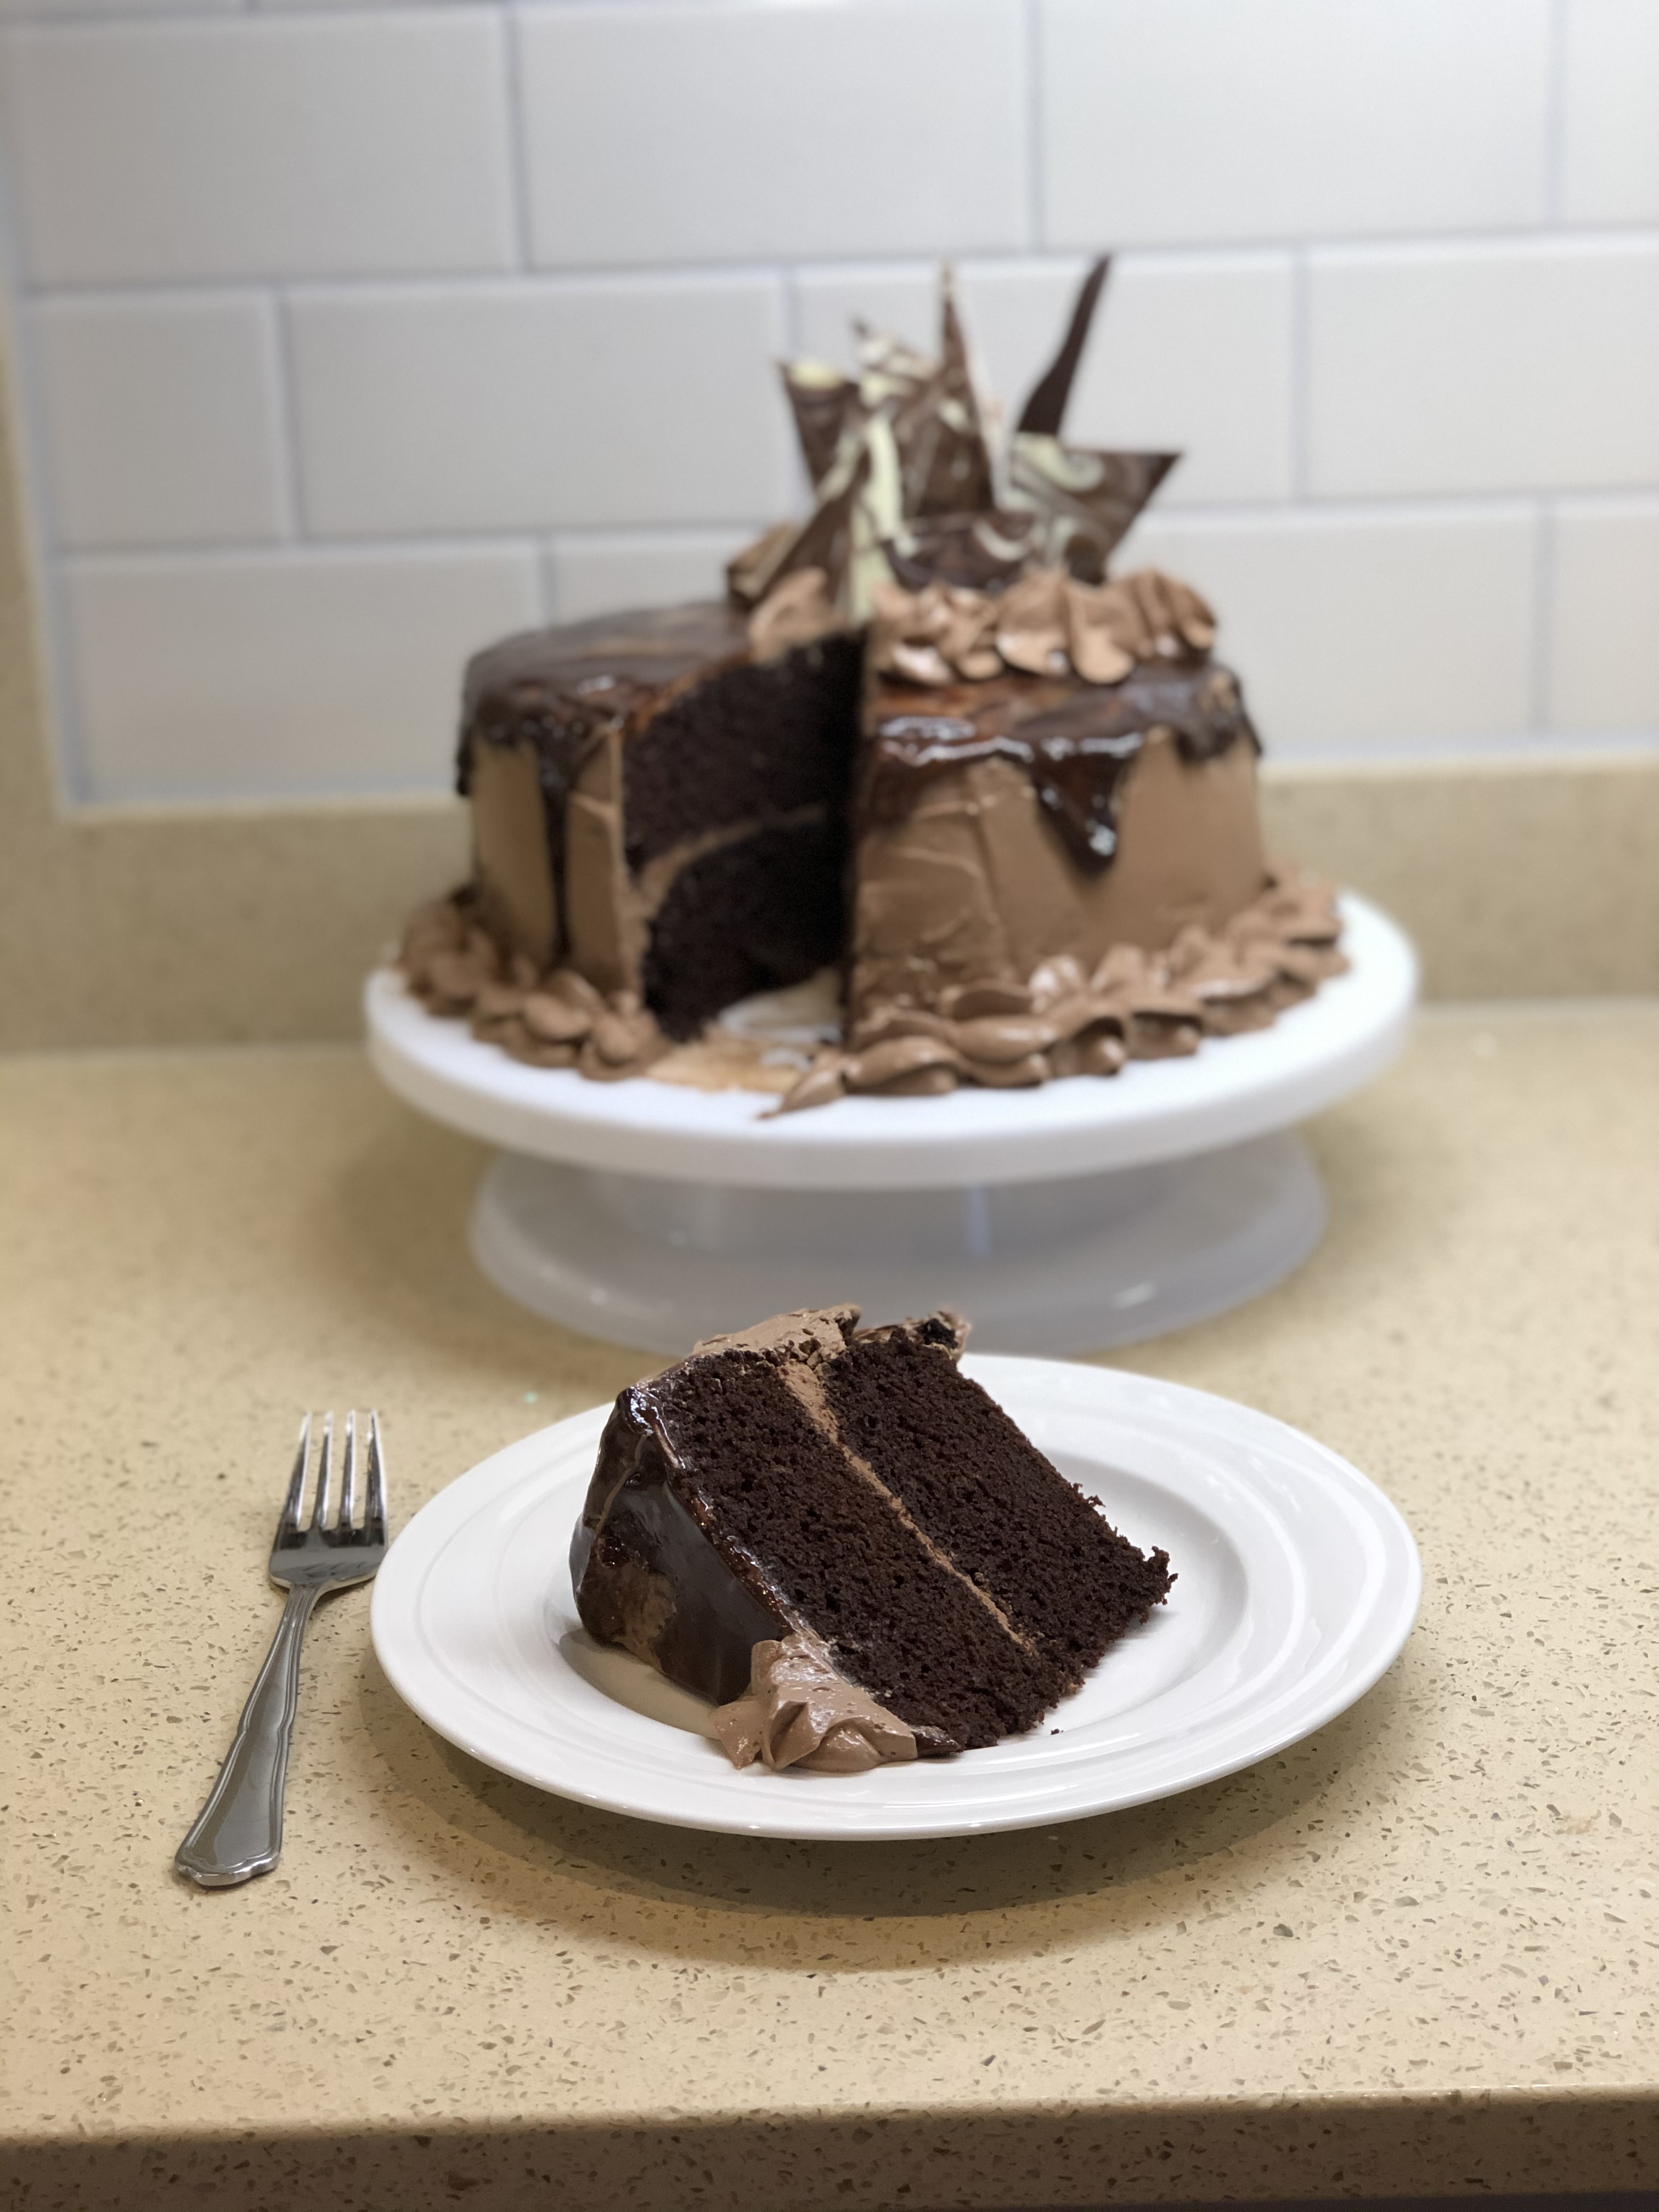
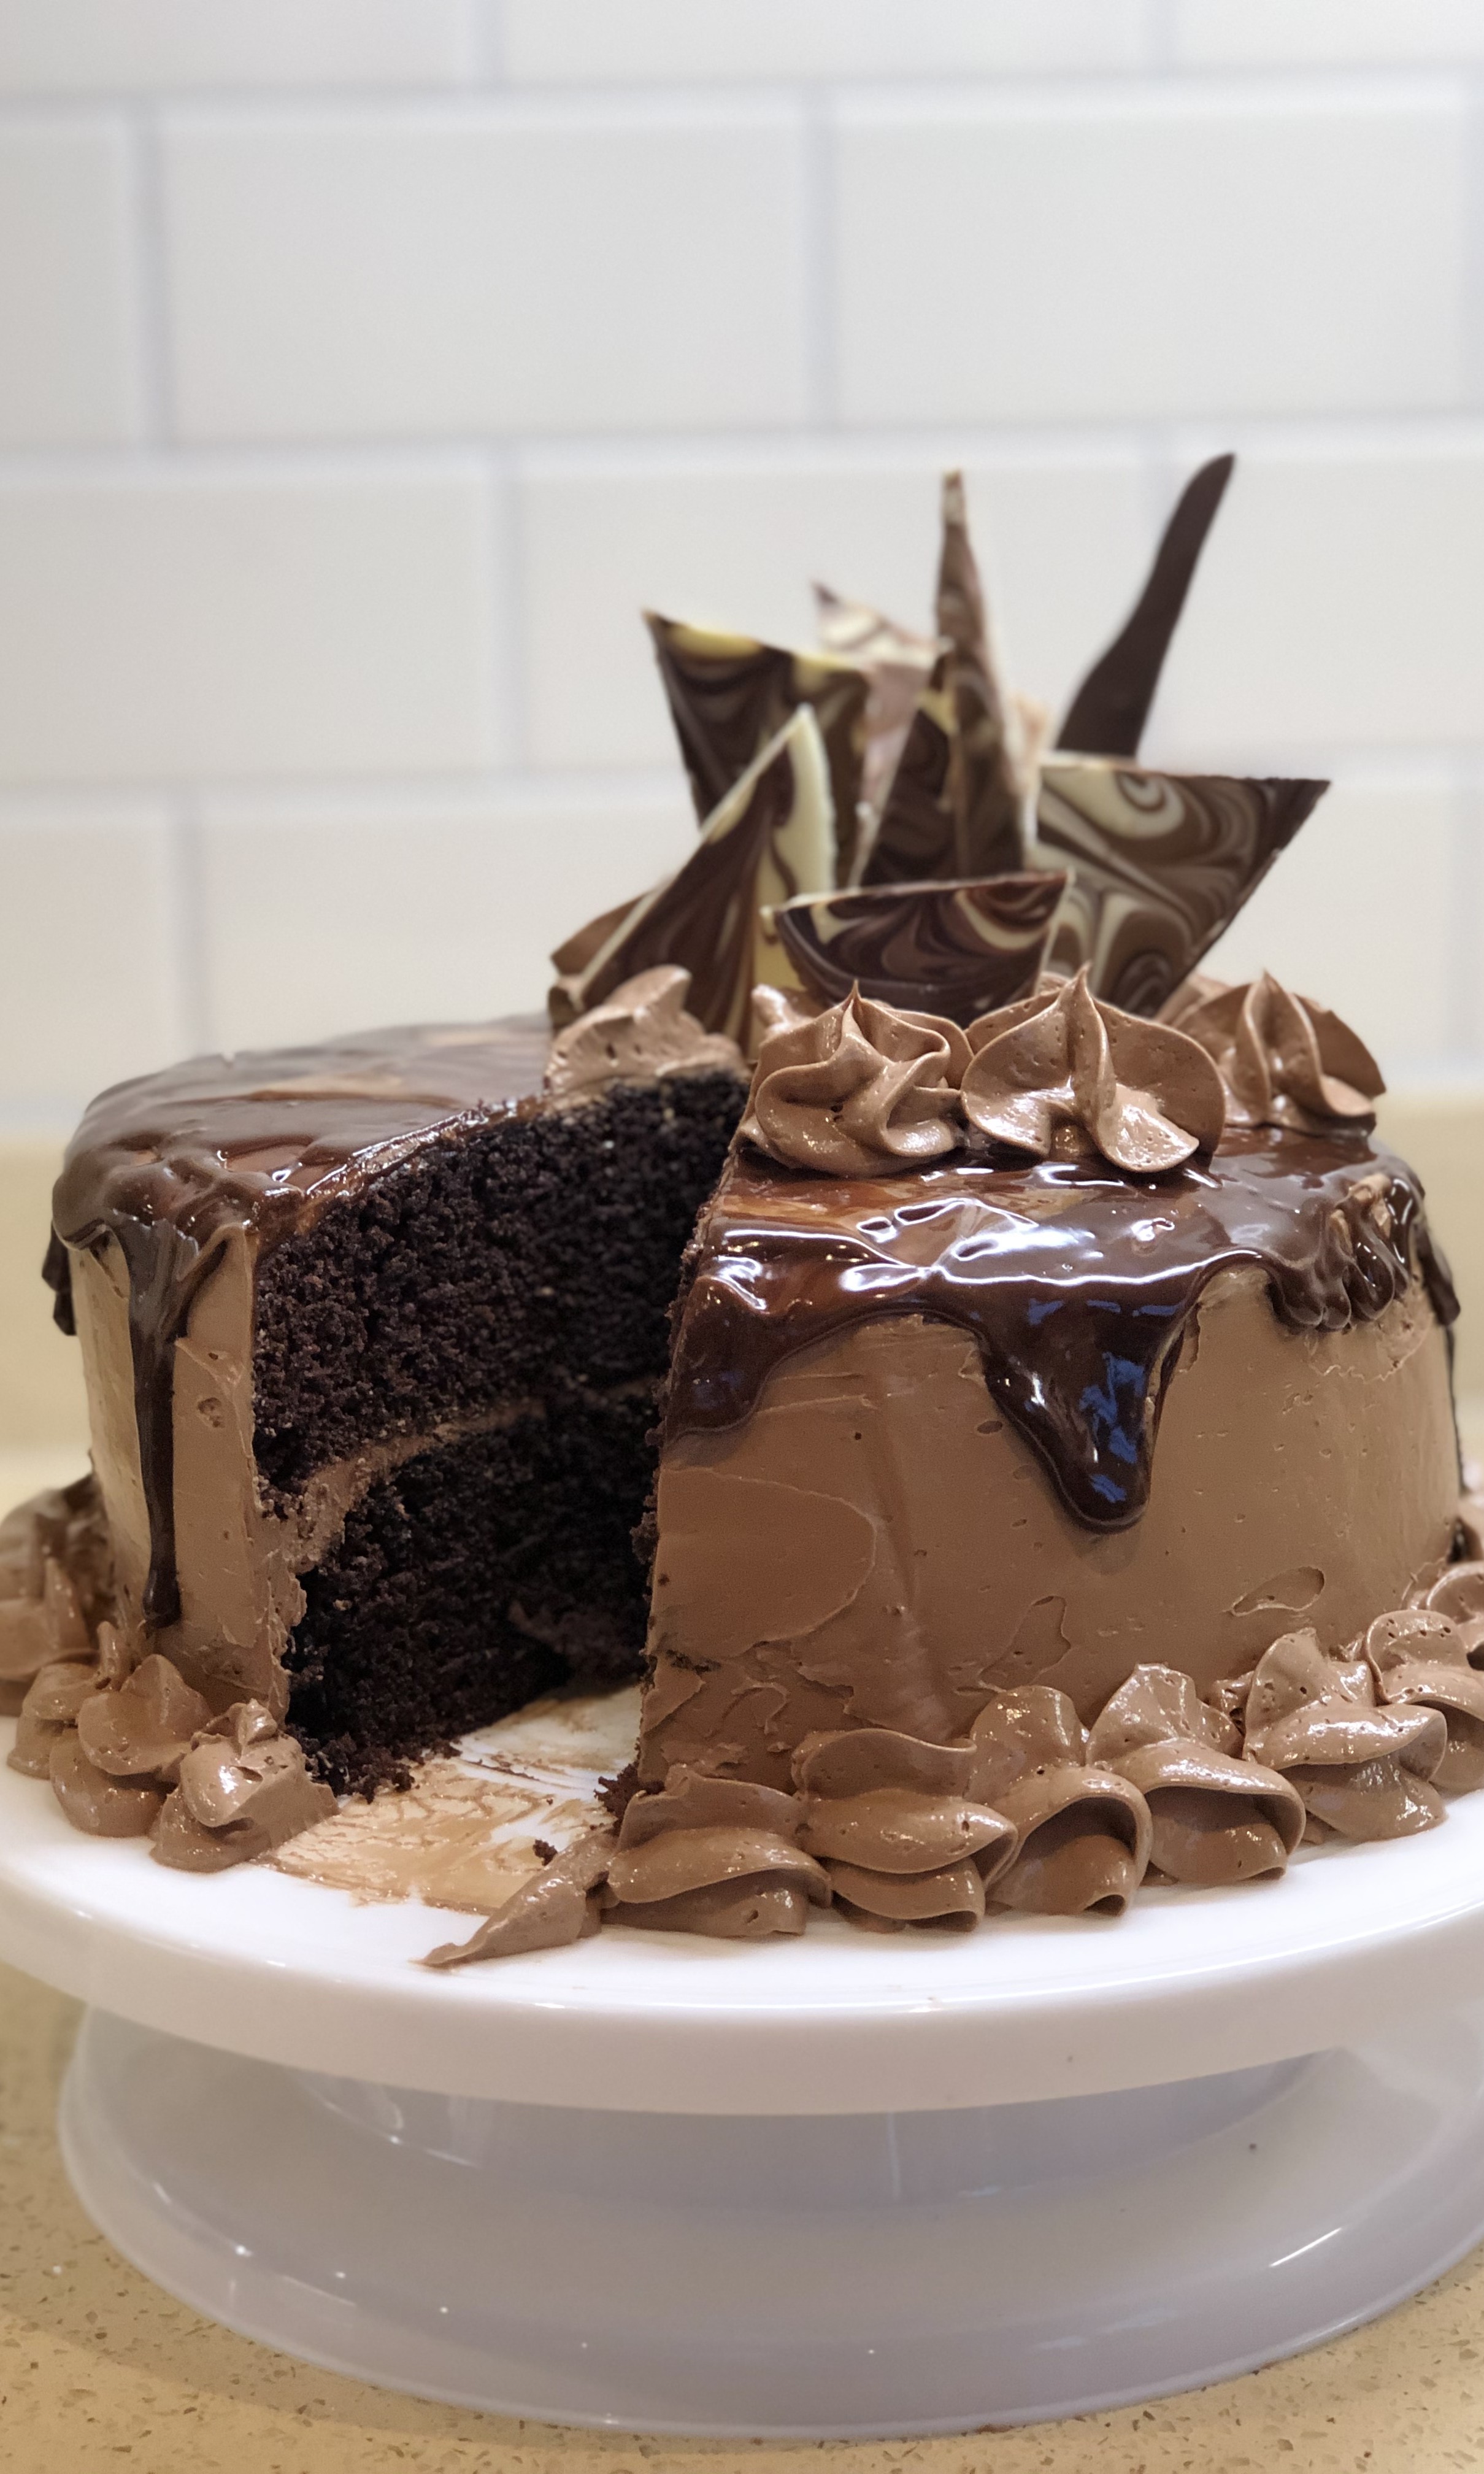
Ultimate Chocolate Cake
When it comes to my birthday, I always want to make my own cake (sad, but it's because I know exactly how I want it!) and this is my go-to recipe!
A rich, moist and fluffy chocolate sponge, with a chocolate buttercream, ganache drip and chocolate shards to finish.
Give it a go!

INGREDIENTS
Serves 12
FOR THE CHOCOLATE SPONGE
150g butter, softened at room temperature
325g soft light brown sugar
1tsp vanilla extract
3 eggs
150ml sour cream
240ml boiling water (from the kettle)
65g cocoa powder
1tbsp instant coffee
290g plain flour
1tsp baking powder
1tsp baking soda
1/2tsp salt
2x8-inch round cake tins
FOR THE BUTTERCREAM FROSTING
200g butter, softened at room temperature
450g icing sugar, sifted
2tbsp milk
100g dark chocolate (at least 70% cocoa solids - make sure it is as dark as you can find as this frosting is very sweet!), melted
60g sour cream
1tsp vanilla extract
FOR THE CHOCOLATE SHARDS
50g dark chocolate, finely chopped
15g milk chocolate, finely chopped
15g white chocolate, finely chopped
50g white chocolate, finely chopped
15g dark chocolate
15g milk chocolate
FOR THE GANACHE DRIP
80ml double cream
80g dark chocolate, finely chopped

METHOD
1
First, make the sponges.
Preheat your oven to 170°C.
Grease the base of two 8-inch round cake tins with some oil or butter and line the with some parchment paper.
2
Sift together the flour, baking powder, bicarbonate of soda and salt in a largeish bowl. Set aside.
In a heatproof jug or bowl, add your cocoa and espresso. Pour over the boiling water, and stir until everything is dissolved. Set aside.
3
Cream together the butter and sugar until light and fluffy.
Add in the eggs and vanilla, and beat until creamy and fluffy.
Mix in the sour cream, followed by the flour mixture. Fold the flour in gently so as not to overmix.
Finally, whilst constantly stirring, stream in the cocoa mixture. Your batter will be very liquid - this makes the cake incredibly tender and moist later.
Divide evenly amongst both of your tins. Bake for 25-30 minutes until a skewer inserted in the centre of the cake comes out clean.
Leave your cakes to cool completely before frosting.
4
Next, make the buttercream.
Beat the butter for a couple of minutes until creamy and light.
Gradually add in the icing sugar (perhaps in 3-4 additions, mind you should probably just accept your fate of being covered in a cloud of icing sugar). Beat well between each addition.
Once all of your sugar has been added, add in the milk and vanilla and beat again. You will begin to recognise this as the buttercream you know and love.
Pour in the melted chocolate (make sure it is no longer hot - my favourite way to melt chocolate is in the microwave for 20 seconds at a time, stirring between each blast until it is completely melted).
Mix again and you will be left with a gorgeous chocolate buttercream.
Finally, fold in the sour cream. I know this sounds odd but it really helps to accentuate the flavour of the chocolate and offset the sweetness of the buttercream. Cover and set aside until ready to use.
5
For the chocolate shards, place the chocolate in separate heatproof bowls and microwave for 20 seconds at a time on high, stirring well between each blast until completely melted.
Onto a small baking tray lined with greaseproof paper, pour over the dark chocolate first, and spread out into a single thin layer.
Dot the other two types of chocolate on top of the dark chocolate randomly with teaspoons, then ripple them through using a skewer to create a marbled pattern.
Repeat using white chocolate as the base colour.
Refrigerate for about 5 minutes, then remove from the fridge and score out triangles with a sharp knife. I recommend making some tall ones, some short ones. Return to the fridge and leave to set completely (I actually like to freeze this for about 10-15 minutes to speed things up).
Once set, cut over the lines you scored out earlier to give you your chocolate shards (or alternatively you can snap off the shards yourself). They are now ready to use! I recommend keeping them in the fridge before using them so that they do not melt in the meantime.
6
Now it's time to assemble your cake.
Begin by levelling your cakes. These gorgeously moist cakes will have a bit of a dome on them, so I recommend removing this with a sharp, serrated knife to make icing/stacking the cakes easier.
I like to use a rotating cake board and offset palette knife for icing the cake (essential for professional-looking cakes!), though any plate or knife will do the job.
Firstly, smooth a small amount of icing into the centre of the cake board (this will help your cake to stick to the board without flying everywhere).
I like to line the base of the cake board witha ring of several overhanging squares of baking parchment going around the circumference of the board (stick them to the icing in the centre). This prevents the cake board from being covered in crumbs and icing.
On top of your iced cake board, place your first sponge. Spread a generous layer of icing in the centre of the cake and top with the next sponge.
7
Now for the crumb coat! Don't panic, this is just a thin layer of icing to 'lock in' any crumbs to prevent you from carrying them with you when you spread on the second coat.
Simply spread a layer of icing all over the cake. It might be helpful to spread any icing that has squelched out from the middle of the cake around the cake. It doesn't need to be a thick layer, or look super pretty. Once the cake is covered in its first layer of icing, place in the fridge for half an hour to firm up.
After the first half hour, it is ready for its second (and final) coat. You can be much more generous with the icing this time. Dollop a big heap onto the top of the cake, and ease it down to the sides of the cake. Using an offset palette knife, spread the icing around the sides. You might notice this creates a bit of a 'lip' on the top of the cake. Simply spread this into the centre of the cake to smooth it off. Don't worry if you put too much icing on - you can always scrape it off and put it back on again!
In order to create a smooth finish, I like to use a bench scraper or cake scraper gently placed up against the side of the cake whilst turning the cake board.
At this stage, it is likely you will have some leftover icing. Do not throw this away! I like to put this in a piping bag fitted with a 2D or star nozzle. Set aside.
8
Now for the ganache. Place the dark chocolate in a small, heatproof bowl. Heat the cream in a small saucepan until it starts to simmer, then pour over the chocolate. Leave to stand for a minute or two, before stirring until all the chocolate has melted into the cream and is smooth.
Pour this over the cake, and let it slowly drip off the edges (I like to use a piping bag for this, with a small hole snipped at the end so I have more control over this). Using an offset palette knife, ease the ganache to the sides of the cake, allowing it to drip down to create that famous drip effect.
Place in the fridge for 20 minutes or so to help begin to set the ganache.
9
To finish, I like to pipe small rosettes around the edge of the cake. Then, I like to sporadically pipe rosettes around the top of the cake, concentrating them at one side of the cake. Around this same area, I like to place in the chocolate shards.
This cake is finally ready to serve!
STORAGE NOTES:
Keep in an airtight container at room temperature for up to 5 days.
Both the sponge and frosting can be made a day or two in advance to save on time. DO NOT store the cake in the fridge to avoid drying out.


TIP #1
I don't want to hear that you've thrown any cake scraps away! Eat them I beg you!

